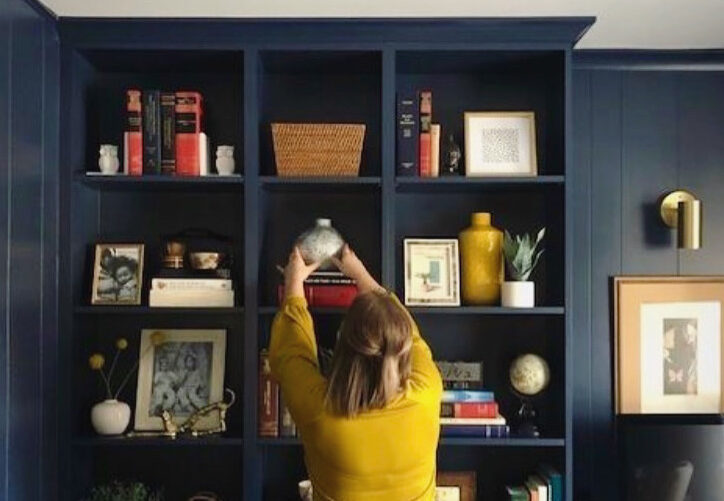
If you have open shelving, or built-ins, in your home you may be feeling overwhelmed on how to fill all the shelves without it looking cluttered.
In this post, I’ll walk you through step-by-step what we do to make your shelves feel filled, balanced, and un-cluttered.
Before you get started…and this may be obvious, but it’s so important so we’re adding it in anyways… CLEAN your shelves! Before you put anything you admire on your shelves make sure they’re wiped down, and ready to go.
Because although open shelving may be beautiful, and such a wonderful way of showcasing the pieces you treasure – they collect dust like a B*tch. SO, starting out on the right foot is always a good thing.
Next – to eliminate some of the shelves you have to style we love adding baskets. This is a super easy way to fill a shelf, while also gaining storage. You can put baskets anywhere on your shelves, but we like to focus them towards the bottom so grabbing the stuff you put in there is easier.
Step 1:
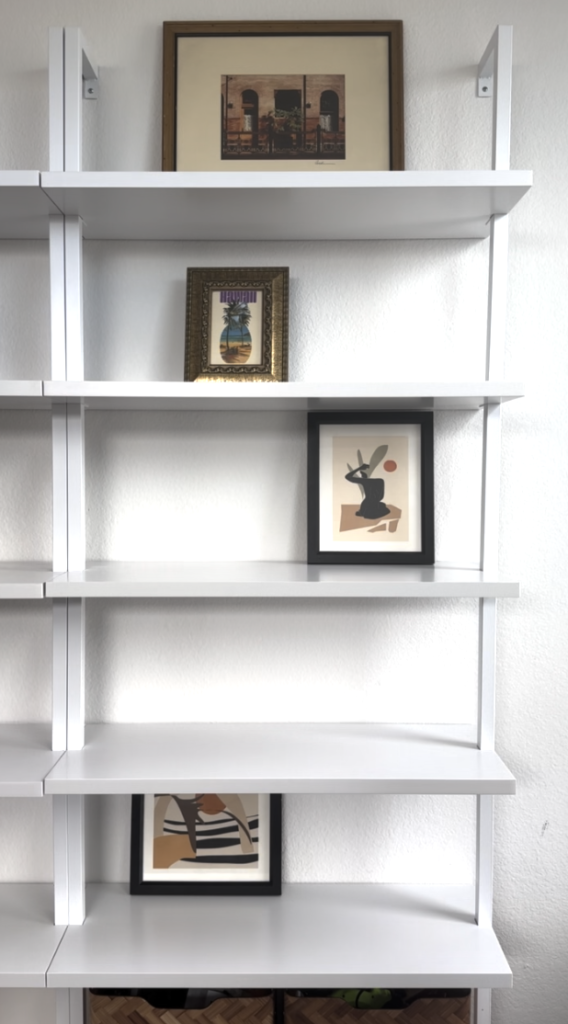
We like to start out by placing small art pieces, or large frames – Why? These will start as the first “layer” of accessories. We’ll add more pieces that will layer in-front of them to create depth. SO, you want these placed first so you can easily layer more pieces in the next steps.
TIP: Be sure to mix up the placement. You don’t want all of your art pieces and frames on the right-side of your bookcase or shelving. You want your shelves to feel balanced.
This is why I like to do one category at a time, and style the entire bookshelf holistically, rather than taking it shelf-by-shelf.
If you place an art piece on the right, place another one on the left of a different shelf, and then another one in the center. This will be the foundation of your styling.
Step 2:
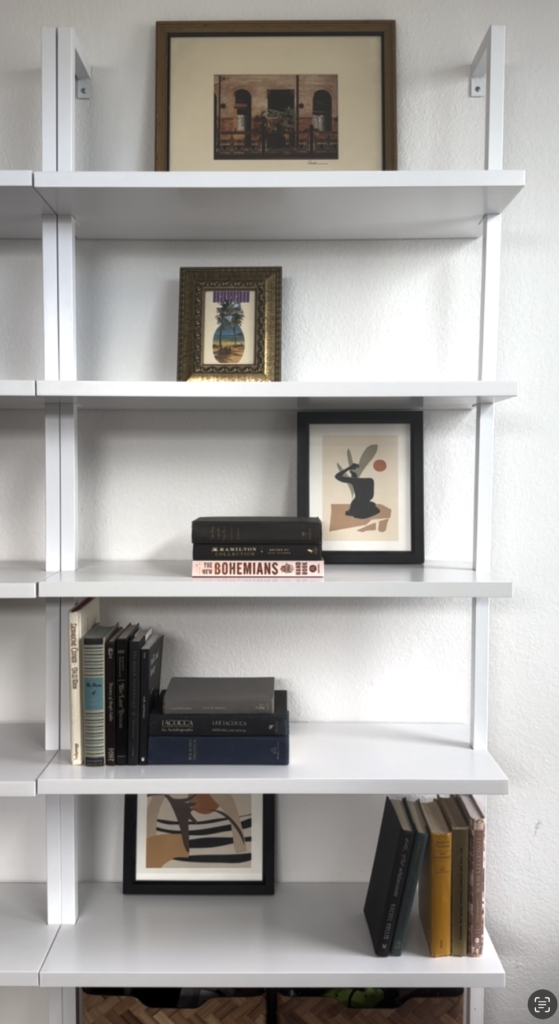
BOOKS. You can really have as many books, or as few books, as you’d like. After-all, it is a BOOK-Shelf. You may choose to ONLY use books on your shelves if it’s a library or office. Or, you may choose to only display your vintage vase collection, and have No books at all.
It really comes down to personal preference, and what’s appropriate for where your shelves are located… so, use your best judgement.
All that being said, I like to style with books. In this example, we’re going with a Goldilocks amount – not too many, not too few, just right.
What’s key to note here, is the direction change of the books. Similar to the art – you’ll want some on the left-side of your shelves, some on the right-side, and some in the middle for balance. But, you’ll ALSO want some to be placed horizontally, and some vertically.
The direction change gives interest! So, it’s not just a boring book-shelf 🙂
Step 3:
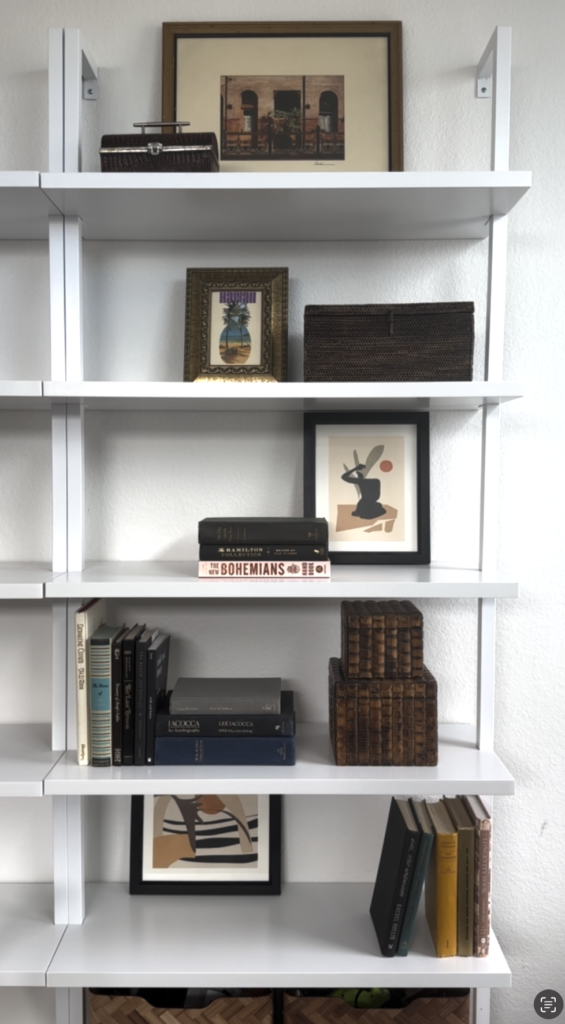
Perhaps my favorite accessory of them all : decorative boxes. Not only can you store sh*t in them as extra storage, but they’re also pretty, and fill your shelves out in a super minimal way.
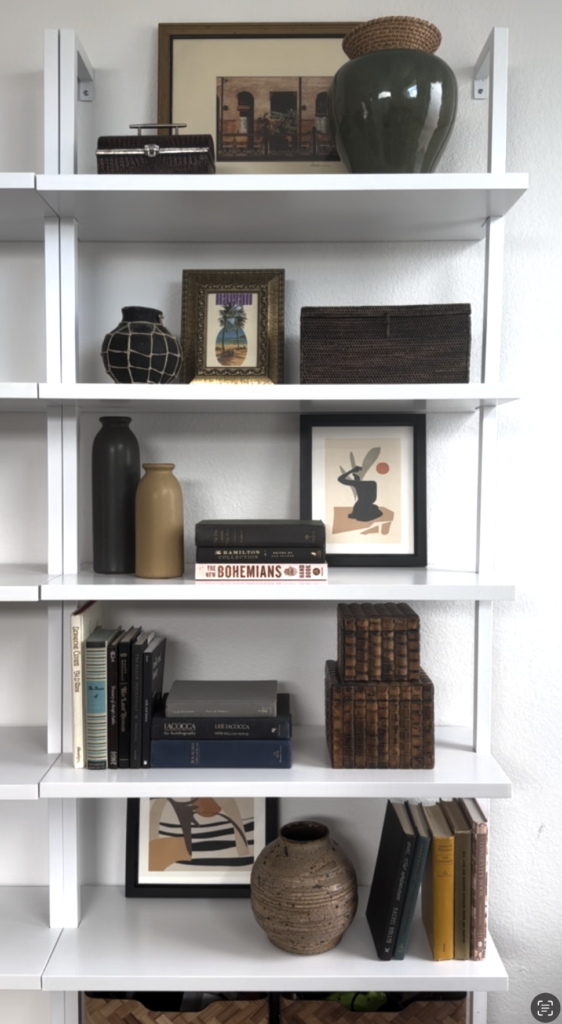
You can see in the image – The shelves are coming along! Adding a few boxes, and BOOM they’re next to finished.
TIP: Mix up the types of boxes you showcase. Maybe you have some glass boxes, texture boxes, wooden, painted, etc. Mix up the textures, colors, sizes and shapes for interest.
Step 4:
Vases – Big ones, small ones, short ones, tall ones. Gather all the vases you love and add ’em in!
At this point, your shelves should start looking almost finished. So, the placement of the vases are crucial. Continue to step back, see where there’s a gap, or it feels “lighter” than the rest, and add a vase.
It’s not done yet – So, don’t over-do it either. But, have fun! Layering is key at this point. Your vases may slightly overlap the art, or interact with the books or boxes in some way.
TIP: Play around with plants! Although, I didn’t use any in this example. Greenery adds so much depth to your shelving and to your space. Fill a few of your vases with some greenery (real or faux) to add some dimension.
Step 5:
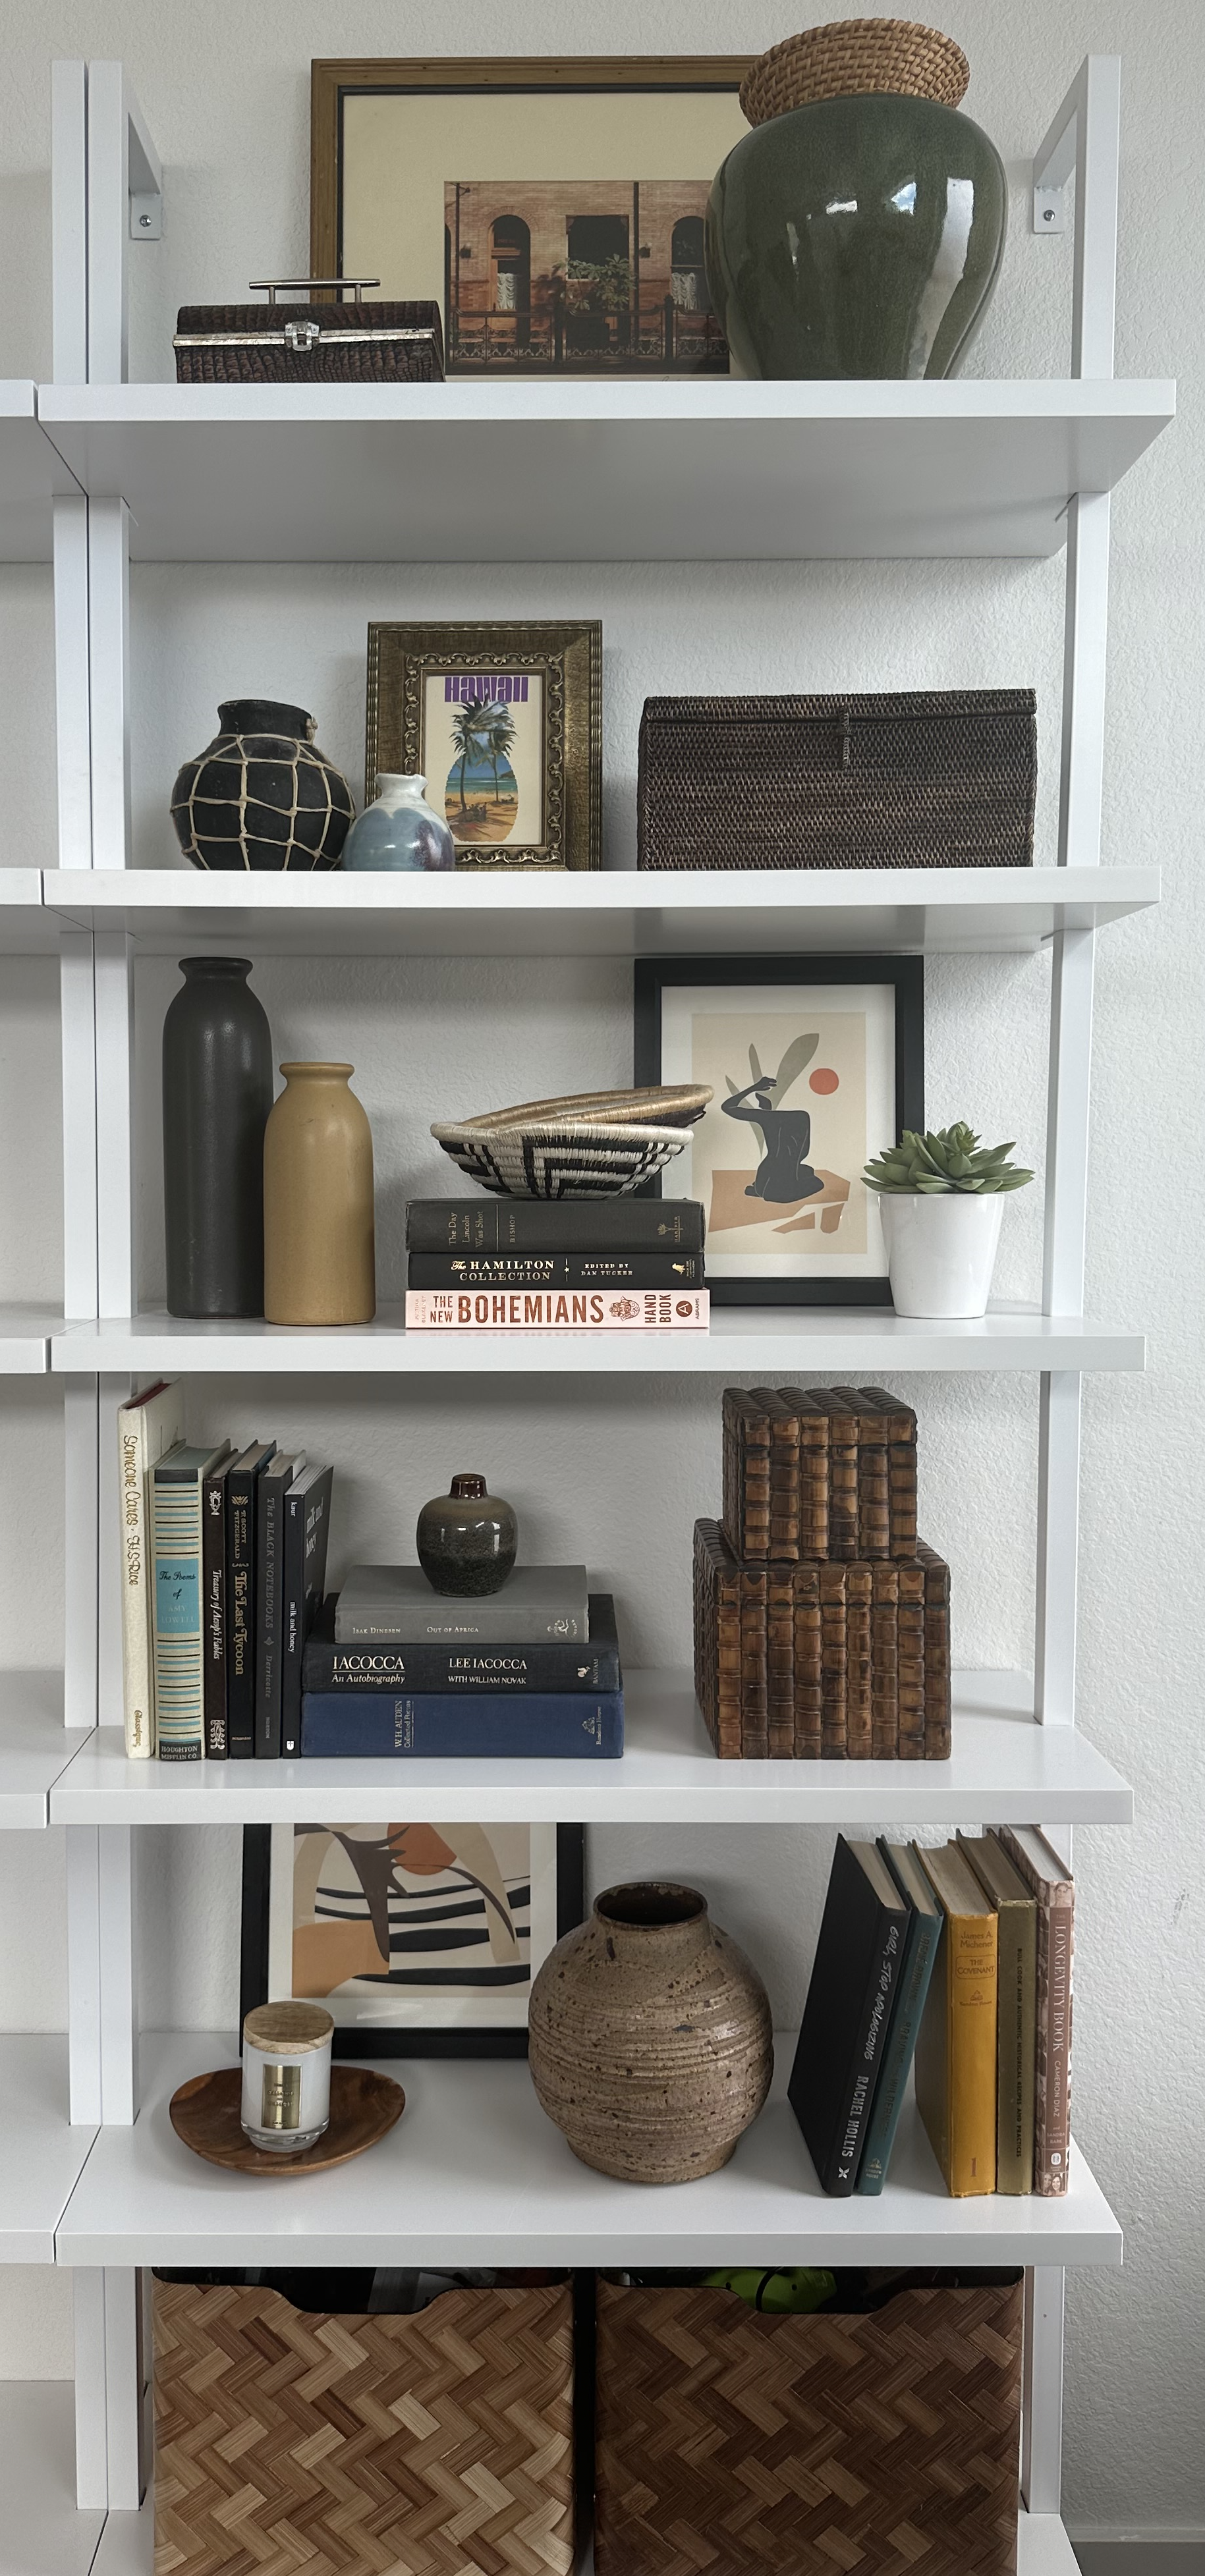
FINALLY – The finishing touches. This is where you can add the small personal pieces to round everything out.
Add some decorative bowls, small objects, a candle, or a little succulent.
I like to add these little guys on top of the other things we’ve already added, so everything “interacts” with one another. If you have a stack of books, or a box, add a little bowl or object on top to complete the stack.
And ENJOY! Once you’ve got your shelves in a good place – Sit back and observe the brilliance of your styling.
TIP: Don’t be afraid to change things up! As you travel, or live your life in general, you’ll more than likely accumulate other pieces that make you happy. The whole point of having styled shelving is to enjoy the pieces on them. Don’t let your shelves become stagnant – Swap out the art, objects, books, or fill them out a bit more over time.
Let your shelves tell your story <3


